Several migration types require that you have an Azure account. These include Google Vault, PST, file server file share, and file server home directory migrations. In these migrations, data moves to Microsoft Azure Blob storage, then MigrationWiz transfers the data to the destination.
The following guide covers some commonly asked questions about using Azure with MigrationWiz. It also provides links to external Microsoft documentation to assist in the setup and management of Azure.
The following questions are not a comprehensive guide to using Azure for MigrationWiz. The migration guide for your scenario will tell you whether or not you need to use Azure and will provide specific steps and details for your migration.
Resources
Microsoft Azure website (to purchase a subscription): Microsoft Azure website
Estimating storage costs: Microsoft Azure Pricing Calculator
Retention Policies
BitTitan storage is meant to be used for small migration projects only; it is a free service provided as a convenience when you do not have your own Azure storage account. There is a limit of 100GB per customer account.
The following retention policies are in place:
- Your files will be purged from BitTitan storage after 30 days.
- Your oldest file(s) may also be purged when attempting to upload a new file and have reached the 100GB limit.
Choosing Azure Storage
You can use either your storage or the BitTitan Azure storage.
Important
IP lockdown will not work for your custom Azure Storage unless Microsoft server IPs are included as well. For more details on Microsoft endpoints, refer to URL & IP address ranges.
When using your own Azure storage:
- There are no storage limitations.
- You can read the data in your Azure storage containers.
- You can upload the PST files into your Azure storage using your favorite upload tool (or even drive the ship to Microsoft).
When using BitTitan Storage:
- You do not need to have your own Azure storage. Instead, you can upload your PSTs to our cloud storage account, but there are some limitations.
- For security, you should use our specialized tool, UploaderWiz, to upload your PSTs to our storage. This securely uploads your PSTs to an isolated container that no one else can access. Once you upload the PST, you cannot read it. Only MigrationWiz can read it to migrate the data into your MigrationWiz project dashboard.
- Bittitan storage has a maximum of 100GB per customer. If the total number of your PST files is larger than this, we recommend purchasing your own Microsoft Azure storage instead and using it for your migration project.
BitTitan Azure Storage
BitTitan has its own Azure storage, Partners can use it for temporary storage on Azure during those migrations that require Azure storage.
Certain migration scenarios follow a two-step process whereby files are uploaded to an Azure container or containers, before being discovered and used by MigrationWiz during the migration. Examples of migration scenarios that require Azure storage include Google Vault, File Server, and PST migrations. (OneDrive, SharePoint, and Teams migrations are not supported)
If a Partner or their customer already has an Azure subscription, they should use this during the upload process. Otherwise, they can use the BitTitan Azure storage to store their files temporarily.
More details about BitTitan storage are listed below:
- BitTitan storage has a limitation of 100GB per customer. If you require more than 100GB, purchase your own Azure subscription. Please read the Purchase Microsoft Azure Subscription article for more details.
- For security, you should use the BitTitan specialized tool, UploaderWiz, to upload your PSTs to BitTitan Azure Storage. This will securely upload your files to an isolated container that no one else can access. Once you upload the files, you cannot read them from the Azure container. Only MigrationWiz can read the files to retrieve the data from the Azure container into your MigrationWiz project dashboard.
BitTitan storage is meant to be used for small migration projects only, it is a free service provided as a convenience when you do not have your own Azure storage account. There is a limit of 100GB per customer account.
The following retention policies are in place:
- Your files will be purged from BitTitan storage after 30 days.
- Your oldest file(s) may also be purged when attempting to upload a new file and have reached the 100GB limit.
Storage Account vs. Bucket
A Storage Account owns the containers where your data resides or will reside. You can find the name of the Storage Account by logging in to your Azure portal and navigating to Storage Accounts. The Storage Account name is entered when first setting up your Endpoint in MigrationWiz.
A Bucket Name is the name of the logical container found within the Storage Account. You must enter the bucket name in the project's Advanced Options, either under the Source or Destination section, this will depend on the migration scenario. To find the Bucket Name, click Containers under the heading BLOB SERVICE while viewing the details of your Storage Account.
Create an Azure Storage Account
Using the new Azure Portal (unless specified, leave settings as default):
- Visit https://portal.azure.com
- Click Storage accounts
- Click Storage Create
- Select the subscription in which you want to create the new storage account.
- Select your Resource group. Create a new one if one does not exist.
- Enter a name for your storage account.
- Choose your datacenter Location.
- Choose Blob storage for the Account kind with Standard performance.
Important
If you are using the OneDrive for Business, SharePoint, or SharePoint Online endpoint for a document migration, do NOT select Blob Storage. Select STORAGEV2 (general purpose v2) with Standard performance.
- In the Replication field, select Locally Redundant Storage (LRS).
- Click Review + create.
- Click Create and go to Resource.
- Select Access keys under Settings.
- Copy the Storage account name and the key 1.
- The Storage account name and one key 1 will be added to the destination endpoint of the MigrationWiz project.
When creating the container within MigrationWiz:
- We recommend creating a container named "migrationwiz" and uploading the PST files into this container. If you name the container something else, it will be necessary to enter the Advanced Options for the MigrationWiz archive project and set the bucket name to be the same as the Azure storage container name. If the container name is created as "migrationwiz", then this step is not required, since the default expected bucket name for migration is preset to be "migrationwiz".
- If the container is created with a name other than "migrationwiz", and the MigrationWiz Advanced Option bucket name is not changed, the migration will fail.
Estimating Azure Costs
Using Azure for your migration will incur a fee from Microsoft only for the Azure storage. Data transfer fees are only incurred with cross-region, and total egress, from Azure traffic. As explained below, there should be no outbound data transfer fees for this migration, because your Azure storage needs to be in the same region as the Destination tenant, for the migration.
If Office 365 is the destination, then MigrationWiz includes logic that checks for the region of the Destination tenant, and will then utilize migration workers only from that same region.
Important
If your Azure storage is in the same region as the tenant, then there will be no outbound storage fees, regardless of the number of transfers per project.When does MigrationWiz transfer data more than once?
Under certain conditions, MigrationWiz will transfer data more than one time. These are some of the scenarios in which MigrationWiz will transfer data from your blob storage more than one time:
- Restarting a migration after the maximum error count is reached
- Restarting a migration after the maximum license consumption is reached
- Both of the above limits are set in the project's Advanced Options screen.
- Restarting a migration after a failed pass
- Restarting a migration after pausing it
In each scenario, MigrationWiz starts from the beginning when you restart the migration.
Storage Keys
Get a Key
A storage access key is used to authenticate an Azure Blob storage account in a migration project.
Follow the steps below to view the storage access keys for an Azure Blob storage account:
- Sign in to the Azure dashboard.
- In the navigation pane, click All Resources.
- Choose the desired storage account.
- Click the key icon to view the access keys for the storage account.
- Each storage account has two storage access keys. Copy both.
- To copy a storage access key, click the copy icon next to the key you want to copy.
Delete a Storage Key After Migration
If you do not plan on reusing the access key, You can regenerate the Azure Blob storage access key once the migration project is completed. This ensures the storage access key cannot be used to access the Azure Blob storage account when the migration project is complete.
Follow the steps below to regenerate the storage access key for an Azure Blob storage account:
- Sign in to the Azure dashboard.
- In the navigation pane, choose All Resources.
- Choose the desired storage account.
- Click on the Key icon to view the access keys for the storage account. Each storage account has two storage access keys.
- Click on Regenerate for the desired storage access key.
Regenerating your access keys affects virtual machines, media services, and any applications dependent on the storage account. All clients that use the access key to access the storage account must be updated to use the new key.
Adding Files
Uploading Files
There are several options available. If metadata information or permissions are needed from an On-Premises environment, like FileServer, use the BitTitan UploaderWiz tool.
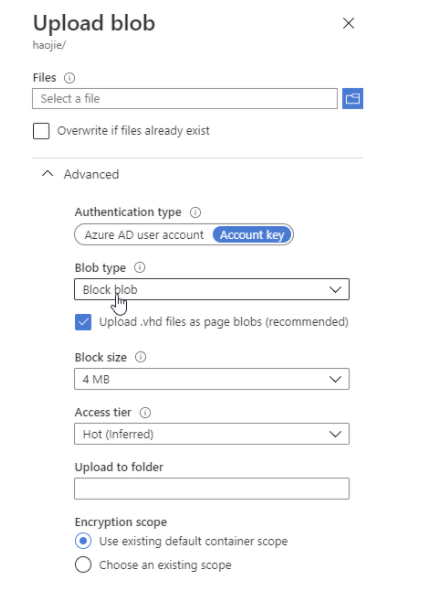
Use BitTitan's UploaderWiz tool to upload data to your own Azure storage account in a public blob container. This blob must be a block blob.
When uploading PST files, you could also use UploaderWiz to place them into the BitTitan Azure storage account, but this is limited to 100GB. Use a utility such as Azure Storage Explorer. Or use a preferred third-party uploader utility. Upload the files into the public blob container, previously created.
Use the Microsoft Azure Import/Export Service to transfer data to the public blob storage.
Create and use your own PowerShell scripts to upload files.
Use a utility such as AZcopy. More information on how to use this with Azure can be found here.
Importing Files
Once you have files in either BitTitan storage or your own Azure storage account, you can add them to your MigrationWiz project by following these steps:
From your project dashboard:
Choose Quick Add to manually add the names of the files uploaded into Azure into your project. If using Quick Add, define the full path to your files (filename included), for example: Filename.pst or Foldername/filename.pst.
- Do not include the URL from BitTitan storage.
- File names in Azure are case-sensitive.
Or
Click on the Autodiscover Items green bar to AutoDiscover, and import the names of the files from BitTitan storage. AutoDiscover is the recommended and easiest option to choose.
- Click on the blue Start Auto Discovery bar in the left-hand panel.
- Once the PST files have been discovered, click the green + Import Items button.
Now choose the Destination to ingest each file into. For example, for PST migrations you will edit the Destination mailbox. To do this, follow the directions here. For OneDrive migrations, you will choose the Office 365 account to ingest into.
Important
IP LockDown does not work with BitTitan Autodiscover using MigrationWiz. To add Users to the project, use Bulk Add via a CSV file or add them manually.Synchronizing Microsoft Entra Objects
For more information on this topic, refer to Azure Identity Considerations KB. You can also use this article from Microsoft for the most up-to-date information: Set up Directory Synchronization.
Create an SQL Azure Database for BitTitan Audit Logging
This is a two-step process:
- Create SQL Database
- Configure Firewall Settings
Create SQL Database
To create a SQL Database, follow the Microsoft guide on creating a SQL database
Important
Under the Pricing tier field, select the pricing tier you require. The recommended setting is Standard S3: 100 DTU, 250GB.
You may need to log out and log in again before your new SQL Database will show in your portal.
Configure Firewall Settings
Configure the firewall settings by following the next steps:
- Select the Resource Group in which you created the SQL database server.
- Click on Overview.
- Click on the SQL database AuditEventLog, then click on Set Server Firewall at the top of the screen.
- Add the following IP address information
- Under Rule name, enter ALL
- Under the Start IP address, enter 1.1.1.1
- Under the End IP address, enter: 255.255.255.254
- Make sure that Allow access to Azure services is set to ON.
This is a required configuration since, by default, no one has access.
You are now ready to enable audit logging within your MigrationWiz project.
Refer to What is the BitTitan Audit Logging Service and what parameters need to be set? for more information on how to enable audit logging within your MigrationWiz project Advanced Options.
Sensitive Data
The Scan Sensitive Data option works in conjunction with Azure Audit Log Options so that all data, except for data converted via OCR, within migrated items is scanned for sensitive data, like credit card numbers and social security numbers.
The Scan Sensitive Data option is located in Advanced Options in MigrationWiz.

When this option is checked, whenever any sensitive data is discovered during migration, MigrationWiz will still migrate the data but will mark the instance of the sensitive data occurrence, and log that instance to the Azure SQL Database. The instance, but not the actual data, will be logged.
- If the severity level has been set to "Fatal" or "Error", the severity level will automatically be increased to "Warning".
- If the severity level has been set to "Warning", "Information", or "Trace", the severity level will remain the same.
When you have migrated with sensitive data detection activated, you might want to retrieve the actual records.
- Use SQL Management Studio to connect to your SQL Azure.
- Go to the appropriate Database and Table.
-
Use this statement to get the data back:
SELECT * FROM [dbo].MyTable WHERE severity = 2